Getting Faster to Insights with Visual User Interview Notes
A method and template to support capturing, synthesis, defining insights and actions
As a Product Manager, Designer, Researcher, or Leader, you usually interview many customers or users to capture first-hand experiences or test prototypes. Processing notes from multiple interviews and extracting key insights often becomes a time-consuming task that distracts from more valuable work.
While some AI tools are attempting to enter this space, I haven’t yet seen one that adequately solves these challenges, including contextual understanding, sensing beyond mere words, and distinguishing essential from non-essential information.
So, until we have better AI tools with better interfaces, we can still improve the note-taking and synthesis process.
Interviewing and taking good notes at the same time is nearly impossible. Having at least one note-taker with you makes the process easier and elevates the quality of your findings by having more ears, eyes, and brains(!) observing your interviews. But sometimes, you might rely on recordings or automated transcripts and do the insight gathering as a second step alone or in a group.
Additionally, bringing along parts of your cross-functional team will save you time later in development because they have seen and heard the context for which they ideate and create.
I tried and saw many different ways to get from structured and semi-structured interviews to valuable insights. Some people write down on paper, others in a document or spreadsheet, and others note down on stickies. Either way, this often results in buried information and hard-to-navigate notes.
Using a structured whiteboard is the quickest method for turning multiple interviews into actionable insights.
The Setup
The key to efficiency is to have a note-taking format that everybody is familiar with and agrees upon before the interview sessions. Everybody takes notes on the same canvas in parallel, streamlining the process from the beginning and reducing extra assembly steps.
At the same time, a whiteboard provides the freedom to cater to the usual messiness of the note-taking process.
I created a template in Miro for you to use as a starting point. It includes an example and an empty template, ready to adapt to your specific interview and goals.
Building blocks that save time and effort
Before describing the board’s structure and how to work with it, let me highlight two key aspects that help to save time later in the process.
Tags for Participants
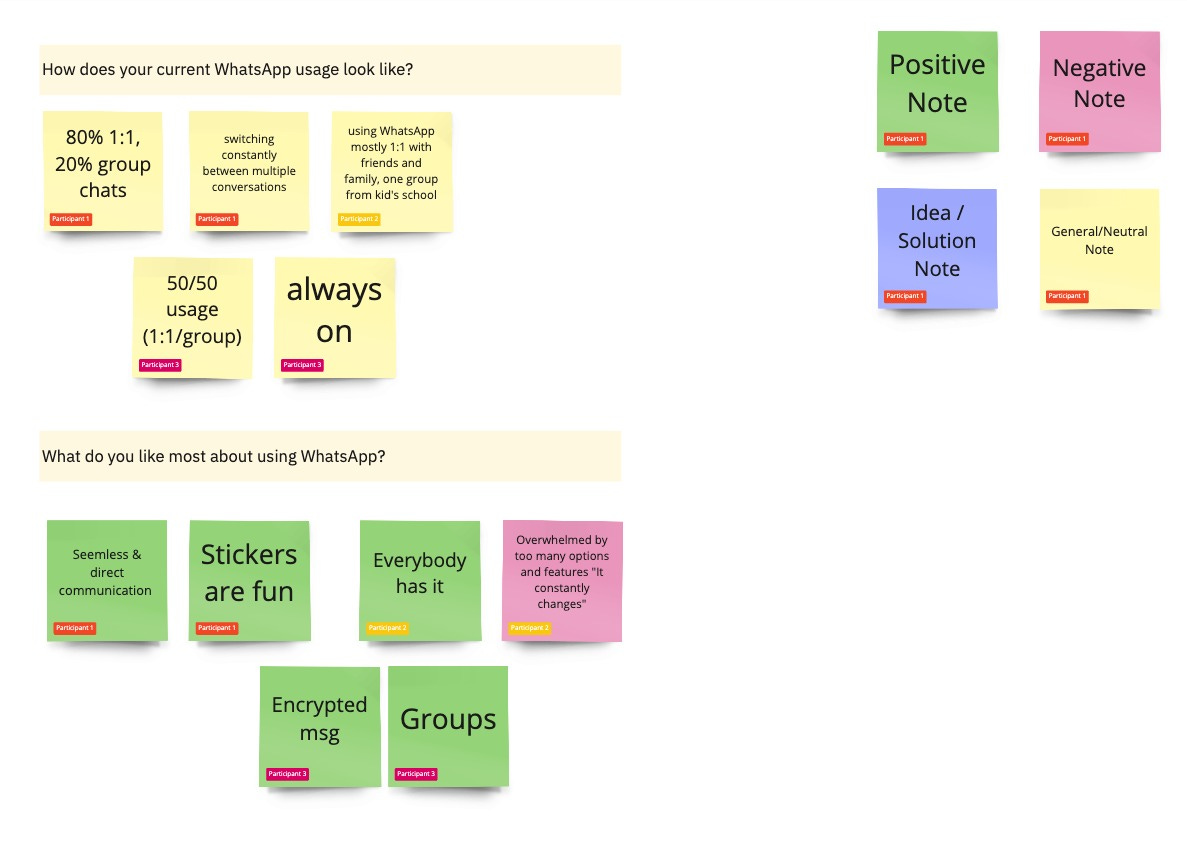
One helpful feature in online whiteboards is using tags to mark notes. Use them to indicate the interview source of each note. Tagging every note with the interviewee enables you to re-order your notes without losing the connection to the source.
Often, note-takers also have ideas or interpretations while taking notes. In this case, they should put their name on the sticky as a tag to keep the origin of this thought.
Another feature of using tags is that they can save you some time while note-taking. If you hear the same feedback again, you can add another participant’s tag to the existing sticky without rewriting the same note. This shows that the remark was mentioned several times, preventing the need to consolidate later.
Sentiment
Another helper to save time and not lose clarity over time is to use the color of the sticky for sentiment. I found it helpful to have four colors:
Green: Positive feedback
Pink: Negative feedback
Yellow: Neutral feedback or general note
Blue: Ideas and solutions
This coding of sentiment while jotting down notes will also help later to identify patterns and groups in the synthesis phase.
Walking Through the Process
The board is structured in multiple sections replicating the interview process, from planning to key insights.
Goals & References
The first section gives an overview of your goal and your audience. At the beginning of the board, add links to reference your research questions, the interview outline, screener documents, product briefs, etc., so people can dive deeper if needed.
Participants
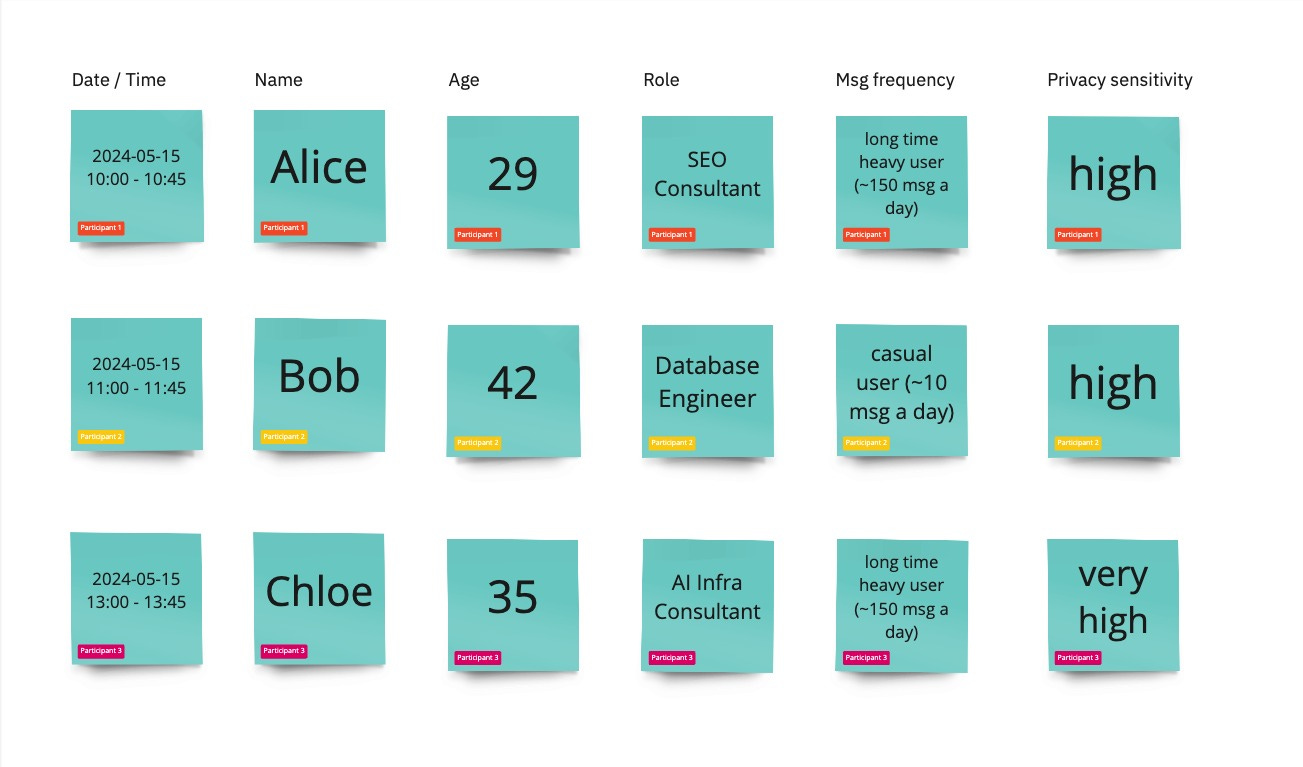
After this, you want to list your participants. Usually, you can already pre-fill this data from your screener. Missing details and corrections can be done during the interview warm-up. Don’t forget to establish the participant tagging system here. I usually pseudonymize the tags.
Capturing Interview Notes
With your existing interview outline, structuring the note section of the board is straightforward. List every question and leave enough space between them for notes. I usually give more structure by splitting the interview into multiple frames. This helps the note-takers follow along with the interview and makes it easy to navigate the board.
I also keep the stickies on all frames nearby so note-takers can copy them quickly.
If you use visual artifacts like screens or prototypes in your interview, include the screenshots in the relevant sections so the note-takers can directly put the stickies onto the artifact. A note like ‘doesn’t recognize active state’ placed directly on the visual element is easier to decipher later than a complicated description of what the visual element is. The same method works if you validate user journeys or processes.
Remember to leave enough space between questions and around visual artifacts for people to write down all their notes.
For every round of interviews, you add to the existing notes. The power of this technique is that you have all the answers to one question in the same place. The tags show the source, and the color shows the sentiment. During succeeding interviews, note-takers can start pre-structuring their notes, making your synthesis quicker.
Synthesis to Define Insights
After completing your interview rounds, you start synthesizing insights in the next section. For this, copy all the notes to the synthesis area, section by section. To get to valuable insights, follow this two-step process:
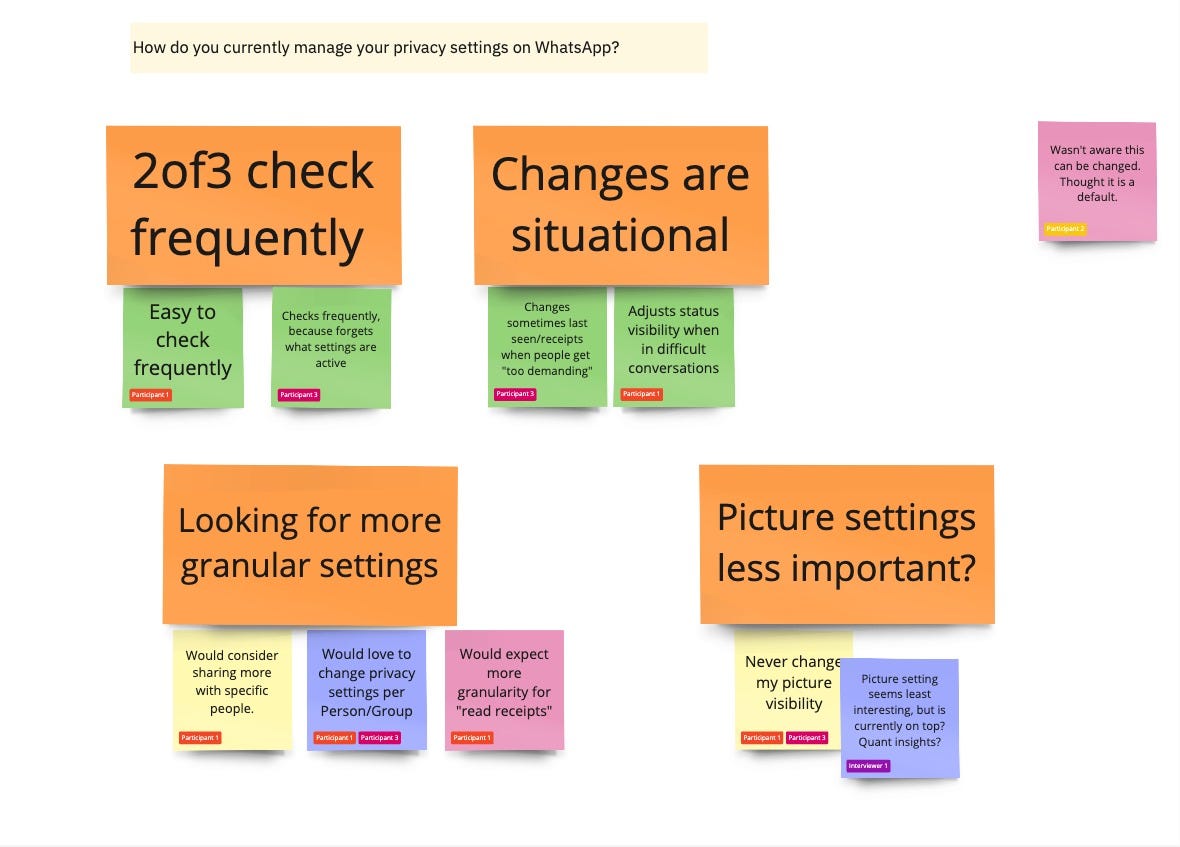
Affinity Mapping: Ask everybody to sort the stickies on the board to determine what fits together. You already have some pre-structure from your interview. Do this step without a lot of discussion. The patterns usually emerge naturally. Some notes won’t have a group, which is fine.
Phrase Insights: Go from pile to pile and phrase the insight. This might need a short discussion in your group. The discussion will help you to reflect on what signals you have heard and seen and what’s important. AI support might be helpful in this step to phrase the insight. If you have a lot of notes from a bigger group of note-takers, split up and divide between sections to speed up. Also, not all notes need to be converted into insights.
Create Focus with Key Insights and Actions
To convert your research back to action, it is essential to reduce it to key insights and define the next steps. If you miss this critical activity, your research might get stale, or you might get stuck in analysis paralysis by further discussing every single detail.
Define Key Insights
A straightforward way to define your key insights is to have a voting session on all your insights. To determine the number of votes, count all the insights, divide by two, and divide again by the number of voters.
But feel free to add more complexity to this step if needed. You can use a 2x2 matrix, a journey map, a weighting system, or whatever the situation or your team needs to reach an agreed-upon position. Just don’t overcomplicate the process. Most of the time, the key insights are pretty obvious, and you see where you need to invest next to learn further.
By the way, a critical insight doesn’t need to be negative. It can also be that your biggest assumption going into the interview got some positive validation or that there was a completely new idea on how to solve this, which you want to follow up on.
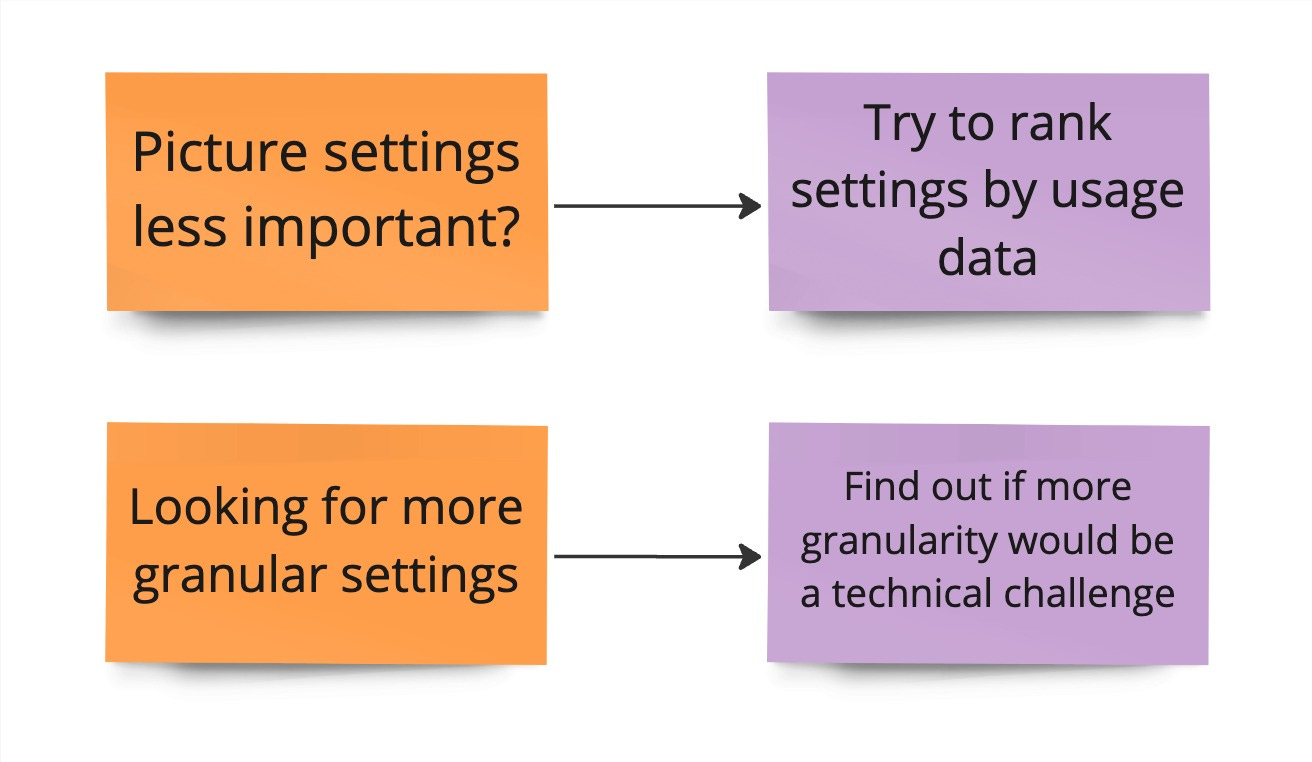
Define Actions
After you have defined your key insights, determine the follow-up action to take. Do you need another iteration of the prototype? Do you have to return to the drawing board because this approach was way off? Do you need to validate further with some other discovery method? Do you need to bring this insight into a different forum to discuss? Are you ready to deliver the first iteration? Whatever it is, define an explicit action to keep progressing.
Start with the Template
Feel free to use my template board as a starting point. Before the interviews, customize it with your questions and artifacts and bring your team on board.
I would be happy to see how you use this technique in your context. Please let me know if you found this helpful or want feedback on your board.
Please contact me if you need more help preparing, conducting, and synthesizing your customer or user interviews. I’m happy to offer my experience.


Interesting - You suggest we should use a whiteboard with sticky notes to help synthesize interview notes. doing this as a team. then grouping them. it will make the insights a lot more visual.
I've struggled with 1) getting the motivation to synthesize interviews 2) making synthesis visual instead of dull.
this approach will make it more visual and the group element could reduce the motivation barrier.